
Guide to Planning a Backyard Cottage in Urban Areas
Is a Backyard Cottage Right for You?
A backyard cottage is an opportunity for homeowners to leverage the development potential of their lots, while helping to ease our region’s housing crisis. A cottage is a great opportunity to house a family member or generate some rental income. The downside is the high cost for all construction projects in our region, the tight constraints on space, and the complex zoning requirements.
This guide is an introduction to the complex feasibility issues of designing a backyard cottage. Although zoning varies based on your jurisdiction, we focus here on Seattle and propose a simple grading system that will allow you to begin the conversation with your architect.

In Seattle's housing crisis, can backyard cottages help families reconnect? (Read Article)
Recent zoning changes make it easier to build these dwellings. They could mix up the modern middle-class American life.
What is an Accessory Dwelling?
An accessory dwelling unit (ADU), by code, contains everything you need to live. Whether an unit attached or unattached to the main house, an ADU is triggered by a planned cooking area - specifically an outlet that is capable of supporting an electric range.
Attached units in new homes are required to have a separate lockable entry, separate circuit breakers and temperature controls, and be separated from the main residence by 1-hour fire rated construction. You do not need to meet these requirements for remodels such as basement conversions, but they must still meet some basic building code items like ceiling height minimums.
Detached accessory dwelling units (DADU’s), or backyard cottages, are required to be separated from the main residence by at least 5 feet of air space, preferably 10 feet to avoid fire-ratings on the exterior walls. Cottages have special allowances: they are allowed to intrude within the rear yard zoning setback. But when they do, they are subject to more strict height limitations. We will walk through these.
I have designed or permitted five cottages in Seattle (see the Sunset Hill Cottage and the Beacon Hill Cottage), and clients love them. But a word of warning - the zoning requirements are very complex, and can trip up even established architects who do not take the feasibility seriously.
Seattle’s ADU Requirements
Seattle’s rules for single family lots allow attached or detached ADUs up to 1,000 square feet. You can even do both, if you go green, or provide affordable housing units. Attached garages do not count toward this total, and parking spaces are not required for the units.
lot coverage & lot width
To determine whether your lot is feasible, you will first make some calculations relying on your lot coverage and lot width.
First you will want to get access to your lot information. I suggest locating your property on the Seattle GIS Map. If you click on your property it will link through to the Seattle Parcel Data, and the GIS also has a convenient measure tool for obtaining your lot dimensions. Alternatively you could walk outside with your tape measure.
Step 1: Check minimum requirements.
A backyard cottage in a single family lot may be feasible if it meets the minimum requirements, including a lot size of at least 3,200 SF, a lot width of at least 25 feet, and a lot depth of at least 70 feet. There is an exception to the lot depth requirement if your lot is over 5,000 sf. If you do not meet these requirements, your lot receives an “F” grade.
Step 2: Know how your lot width affects building height.
The width of your lot directly effects the height of your allowed backyard cottage. Two terms to know:
Base height: the height of the structure at the exterior face of the wall.
Ridge height: the height of the highest point on the roof. This is an extra allowance, over the base height, and determined by the shape of your roof.
Lots are broken into the following categories:
Lots less than 30’ wide. The base height is only 14’, which makes a one-story unit more practical. The ridge may extend 3’ higher. Add a green roof or green building standard for another 2’ of height. (Lots less than 30 feet wide will probably prove infeasible for other reasons such as lot coverage, which we will get to next.)
Lots 30’-40’ wide. The base height is 16’, which is the minimum feasible for a two-story unit. The ridge may extend 7’ for a pitched roof, or 4’ for a shed roof. Plus the 2’ green bonus.
Lots 40’ -50’ wide. The base height is 18 feet, which is a comfortable 2-story structure. The ridge may extend 5’ for a pitched roof or 4’ for a shed roof. Plus the 2’ green bonus.
Lots more than 50’ wide. The base height is 18 feet, which is a comfortable 2-story structure. The ridge may extend 7’ (the only change) for a pitched roof or 4’ for a shed roof. Plus the 2’ green bonus.
Step 3: Calculate your available lot coverage.
In single family zones, you are typically allowed a lot coverage of 35%. This means you can cover 35% of your lot with structures. If you have a small lot with a large house, you may be very close to your maximum lot coverage, although if your lot is under 5,000 sf you are allowed 1,000 sf + 15%. Please note that we are not talking about building areas on upper stories, just the footprint of the structures on the ground. This includes occupied structures, garages, sheds, and so forth.
To calculate lot coverage, multiply your lot size by 0.35 and subtract all the existing coverage. Ignore any coverage you plan to demolish, like that old shed that has lost the battle with the blackberry bushes.
(Lot Size * 0.35) - (House Coverage) - (Garage Coverage) - (Shed Coverage) … = Remaining Coverage.
You might find the first floor area of your house online, but you can also run a tape around your house and take dimensions, measuring from the exterior face of your foundation wall, and calculating the area. Whatever remains is your available lot coverage, which has a big impact on your score. If you have zero coverage remaining, your lot receives an “F” grade.
Step 4: What’s my preliminary grade?
In general, the wider your lot the better, and the more available lot coverage the better. I have developed a grading system based on what kinds of solutions you might find if you are trying to maximize the development potential of the lot. Let’s start from worse case to best case.
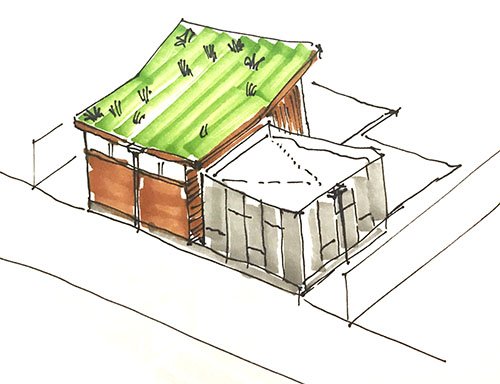
D Grade lots
Single story cottages with an optional sleeping loft.
There are not very many lots less than 30 feet wide that have available lot coverage. However, if you have a few hundred feet available, the 14’ base height with only a few feet for the ridge will most likely constrain your project to a one story structure. However, you could think about a sleeping loft, and if it is not more than 200 sf, it will not require a code-compliant stairway or ceiling height. Substitute a ships ladder to save space.

C grade lots
2 story cottages, or carriage houses (over a garage), with a footprint of about 400 sf.
For lots greater than 30 feet wide, if you have around 400 sf of available lot coverage, you can build a 2-story DADU of around 800 sf, with a 16’ base height. This is the minimum size that I would recommend for a 3-bedroom unit. In this kind of unit, there is a shared kitchen and dining area, and one of the bedrooms can be used as a den. These units are also the some of the most desperately needed affordable housing in Seattle for families with children.
If your lot is more than 40 feet wide, you get a C+ for the height bonus to 18 feet. If you have less than 400 sf of available coverage you may still be able to salvage a two-story structure with up to two bedrooms.
When a garage is desirable, lots with about 400 sf of available lot coverage can also accommodate a “carriage House,” in which a unit is built over a detached garage. To keep the garage ceiling low, consider an out-swing garage door instead of an overhead door.

B Grade lots
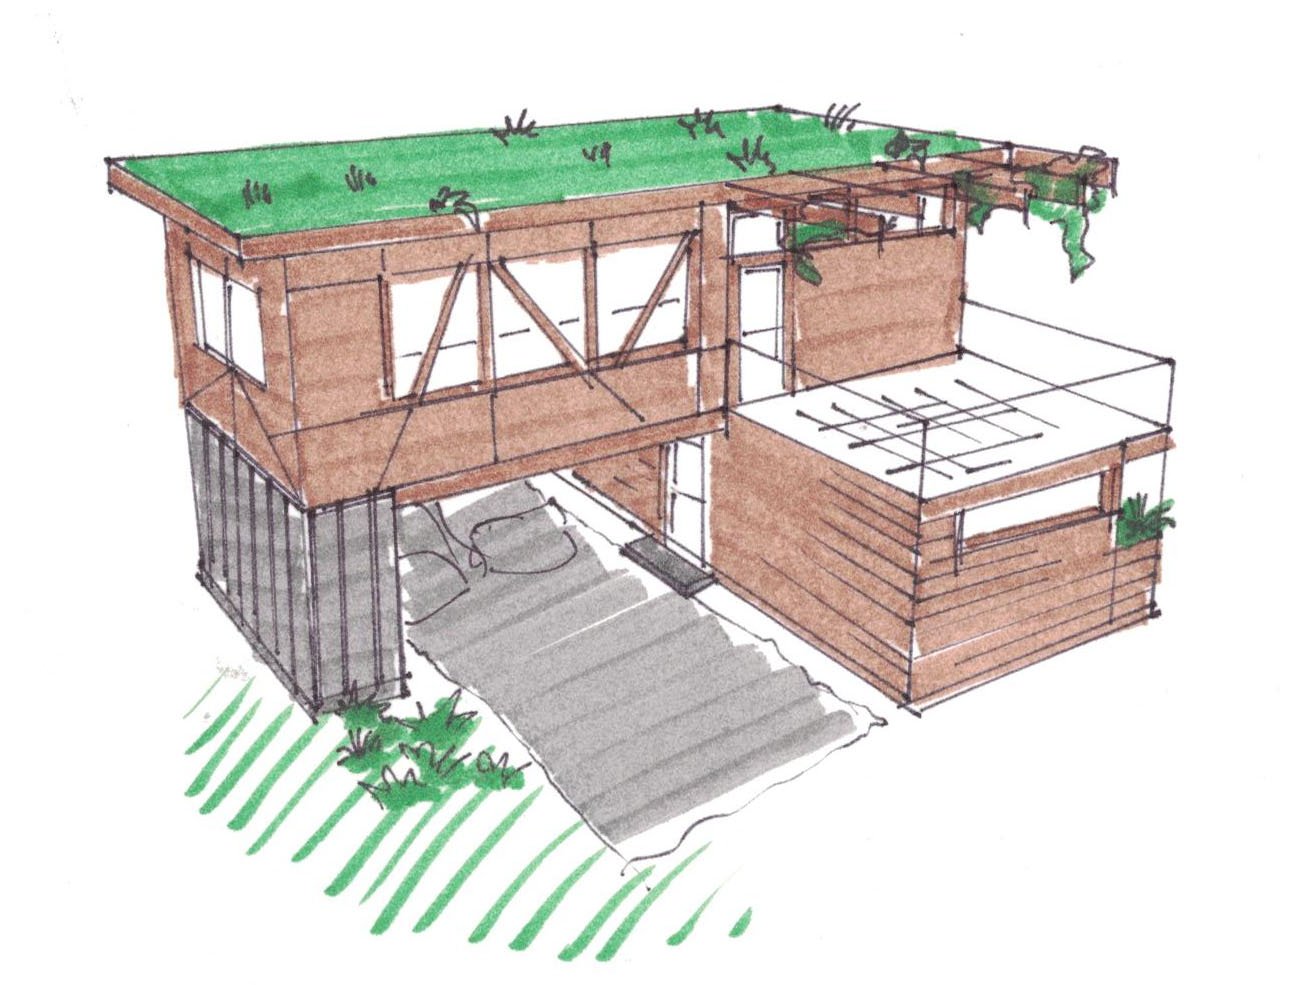
2 story cottages that maximize the 1,000 sf allowed area, with an optional attached garage. Consider a rooftop deck for added privacy.
If you have at least 500 sf of available lot coverage, you can build 2-story backyard cottage that maximizes the allowed 1,000 sf development potential. With another 250 sf, you can attach a garage, depending on driveway access.
To offer the occupant more private space, consider adding a rooftop deck to the garage. This is feasible if the area of the deck is outside any of the side and rear setbacks.
If your lot is more than 40 feet wide, you get the height bonus to 18 feet, so upgrade to B+.

A grade lots
Flexibility to build 1,000 sf on the ground floor plus an attached garage, but enough height to comfortably fit a 2-story structure.
If you have 1,000 sf of available lot coverage, you can build a backyard cottage entirely on the ground story, unless you prefer a 2-story structure. With an additional 250 sf, you can attach a garage. If your lot is more than 40 feet wide, you get an A+.
This is the most flexible position for a property owner but you often see more compact cottages in order to keep the backyard available for the main residence. With an A grade, you will have a lot of design flexibility.
setbacks and rear yard area
Score high on the scorecard? Great, but it is only a starting point. Now let’s see if you have space to build.
Step 5: Do you have room enough to build outside setbacks?
Things are tight in a backyard! As you draw your available building site, know the following:
A cottage will need to be a minimum of 5’-0” feet away from the main residence, but preferably 10’-0” or else you will need to respect building code restrictions for fire protection.
A cottage will need to be a minimum of 5’-0” from side lot lines, unless you secure an easement from your neighbor. However, being so close to the lot line may still require temporary shoring during excavation, unless you have a shallow foundation such as a slab on grade. Give yourself as much space as possible.
A cottage will need to be a minimum of 5’-0” from the rear lot line, unless you are on an alley. If you are on an alley, the setback is 0’-0”, but in reality 1’-6” gives you the minimum needed to get foundations and drainage in.
The entrance to the unit will need to be at least 10’-0” from the lot line, if it is facing a side lot line.
Step 6: Do you have enough room to build in your rear yard?
In addition to the non-yard area, a cottage is allowed to occupy up to 60% of the rear yard area, but only if you aren’t removing a significant or 2’-0” diameter trees.
The rear yard area is the area between your rear lot line, and your rear setback line. The rear setback line is measured from the rear lot line and is the lesser of 25’-0”, or 20% of your lot depth, with a minimum of 10’-0” for very small lots. But here’s the rub - if you already have structures in your rear yard that you intend to keep, they take away from what you may use for the cottage.
To add complexity to this, if you are on an alley, you calculate your rear yard area as the area between the centerline of the alley, and your rear setback line. So it might give you a bonus of around 150 sf in your rear yard.
If you have defined a building plot outside of these setbacks that allows you to use most (or all) of your available lot coverage, you are in business. That is, so long as you also don’t have any issues with the following…
other site considerations
Some of the items on the laundry list that need to be considered include the following:
Step 7: Do you have any critical areas?
If you use the Seattle GIS Map, locate your parcel, and click through to the Seattle Parcel Data you should be able to view any critical areas mapped on the property, such as wetlands, riparian areas, steep slopes, landslide hazards, and “seismic hazards” (code for unstable fill dirt.) You can even view these in the GIS map if you turn on the right layers. Any of these can throw a project into jeopardy, with buffers and setbacks that can be considerable.
Step 8: Do you have any significant trees?
Seattle wants to preserve its urban forest and will make you respect buffers to large, healthy trees that are “significant.” You are only allowed to impact a portion of the area within the drip line. If they are unhealthy and dangerous, you may obtain permission to remove them with an arborist report. Seattle will only give you a rear yard area bonus of 20% if you are working around significant trees. (Also note, that cottages are now subject to new tree planting/preservation requirements.)
Step 9: Does your property have a slope? How much?
You think your site is flat? It is almost never, ever, flat. And Seattle will not take your word for it, especially if your project is knocking on the door of the height limits, which is why a topographical survey is almost always required with a permit submittal. Even slight slopes will govern the height of your foundation walls, excavation, the complexity of the concrete work, shoring issues, and drainage issues. Flat sites, on the other hand, may have drainage issues that will require the services of a civil engineer.
On lots with significant slopes, you may have other options available to you such as terraced garages. And a portion of underground stories does not count against the floor area limits.
Step 10: For new garages, is it feasible to create a new driveway & curb cut?
If you are on an alley, accessing a garage is easy. If you already have driveway access to the street, great. But if you need to create a new driveway from the street (usually on corner or flag lots), you must consult the code. If you need a second curb cut, it will need to be allowed based on your street frontage, and be clear of obstacles such as light poles, power poles, and street trees.
utilities
You might imagine that since there is already a house on your lot, utilities shouldn’t be a problem! But since there is already a house on your lot, there is guaranteed to be a house in the way of construction activity and utility connections. Here is a introduction to some of the potential issues.
Step 11: Is your sewer in good shape?
Seattle must allow you to connect the sewer from a backyard cottage to the nearest branch. This can either tie directly into the waste line in the main residence, or it can tie in to the waste line downstream of the main residence. Best practice is to find a good connection point that has a 6” pipe, but this is not a requirement. Be sure to have your sewer located, scoped, and lined if needed. Know the elevation of the sewer to ensure that you will have positive drainage from the new cottage. If not, you will need a pump. Also note: King County requires a capacity charge for new sewer connections.
Step 12: Do you have any hidden underground utilities?
It is vital to obtain a survey that shows all underground utilities. Have the surveyor call in a utility locate prior to the survey work, so that these will be shown on the survey. Then, before you break ground, you will need to mark them again. Utilities in the street should be shown with their elevations noted. If you discover (worse case scenario) a concrete stormwater culvert running diagonally through your back yard, this may make the entire project infeasible. King County requires setbacks from this kind of infrastructure. (Special note: sometimes a lot will be for sale with serious issues like this - be sure you seek professional guidance before jumping on the last undeveloped lot in Seattle!)
Step 13: Calculate your total new & replaced impervious surface.
City-wide practices for managing stormwater have gotten better over the years, so expect your backyard cottage to be much more of a hassle than the main residence was, twenty years ago. The total area of new impervious surface (roof, new outdoor patio, replaced driveway area, etc) will govern how you are required to manage stormwater.
When your architect submits a preliminary site plan, Seattle will visit your lot and issue a Preliminary Application Report (PAR). This will provide a lot of useful information, especially with regard to stormwater.
Less than 750 sf. You won’t be required to do anything fancy. Splash blocks will allow stormwater to run into the lawn.
750 sf -1,500 sf. You will be required to connect to an approved off-site discharge, such as a culvert or street gutter.
More than 1,500 sf. You will be required to provide on-site stormwater management (OSM) which may include retention or infiltration. This is fancy stuff. To know the preferred strategy you may need an infiltration study and a civil engineer.
Less than 1,500 sf, but no off-site discharge? If there is no approved or accessible way to discharge stormwater, you will be required to provide a bio-retention planter that overflows into a drywell. Neither of these items count against your lot coverage, but planning for them is another thing.
Step 14: Will you require sprinklers?
If you are at the end of a long driveway that is inaccessible to a fire truck, you may be required to provide a sprinkler system, even if the main residence does not currently have one.
The Feasibility of Prefab Homes as ADU’s

If there is a good chance you can build on your lot, you may be wondering how you should go about it. I have designed stick-framed cottages, modular cottages, and cottages built from prefabricated panels. Here is an introduction to some of the issues to consider.
What are the options?
Aside from stick framing a house in a traditional way, you can order prefabricated structural insulation panels. SIP’s panels typically come with layers of sheathing bonded to an insulated core. These panels may be small enough for two men to carry, but most often it is valuable to set the panels with a boom truck or crane, rapidly over a day or two.
Alternatively, you can build a custom modular home, in which nearly all work, including interior and exterior finishes, is done at the factory. Site excavation and foundation work must be done before the modules arrive, and the mods are set in one day with a crane. Afterward there is some amount of work that must be done on site, from structural holddowns to finish patching.
The process for building an ADU
The information in this article is intended as an introduction; it is extremely important to have a feasibility analysis performed by a reputable design professional, preferably a licensed architect. Why is this important? If anything is missed early in the feasibility analysis, it becomes the responsibility of the architect to correct the mistake.
During feasibility, you will begin to line up consultants who will be needed for the job, and obtain any reports necessary for the project. Note that although the project may be small, the prep work is usually the same size as that for a larger structure. These are likely to include:
A survey that includes topography, underground utilities located and mapped, existing structures, easements, and so forth.
A soils report by a geotechnical engineer. Although is the most loathed expenditure, it is often critical for permit if there are any unusual soil conditions or slopes.
An infiltration report, also able to be conducted by the geotech, if the impervious areas are likely to exceed 1,500 sf or if there is no off-site discharge.
An arborist report, if there are significant trees. Other environmental consultants as required.
With enough of this material in hand, design can begin.
Early in the process, the architect should submit a preliminary site plan to the city to begin the process of obtaining a Preliminary Application Report (PAR). In my experience, these are taking two months to turn around, so start them early.
As soon as the idea starts to take shape for the project, the architect can help you line up other consultants that may include:
A structural engineer.
A civil engineer. Since Seattle provides a convenient stormwater calculator and standard details, it is much easier to do stormwater design in Seattle without a licensed civil engineer. But there are always subtleties that will require discussions with the side sewer desk in the Seattle DCI.
A sprinkler designer. Sprinklers may be required if you are at the end of a long private road that makes it difficult for a fire truck to access the house.
A design-build mechanical engineer.
For modular: an MEP design consultant(s).
Once construction documents are prepared, they may be submitted for permit.
the next step
I hope you enjoyed this guide. If you have comments or questions, feel free to reach out. If you are intending to move forward with your own backyard cottage project, we would be happy to help.